Jan
Vinyl Essential Guide
Weed Out Excess Vinyl Like a Pro! 🎨✨
Let’s be honest — weeding is the part of a vinyl project that can make or break your design. Peel away the excess cleanly and you’ve got a crisp, pro-looking cut. Get it wrong and you’re picking at tiny pieces for half an hour, tearing letters, and wasting good HTV. 😅
Here’s the secret: weeding like a pro isn’t about patience, it’s about technique. Whether you’re running a Cricut, a Silhouette, or any other cutter, these tricks will get you cleaner designs, smoother transfers, and a lot less frustration. Let’s dig in.
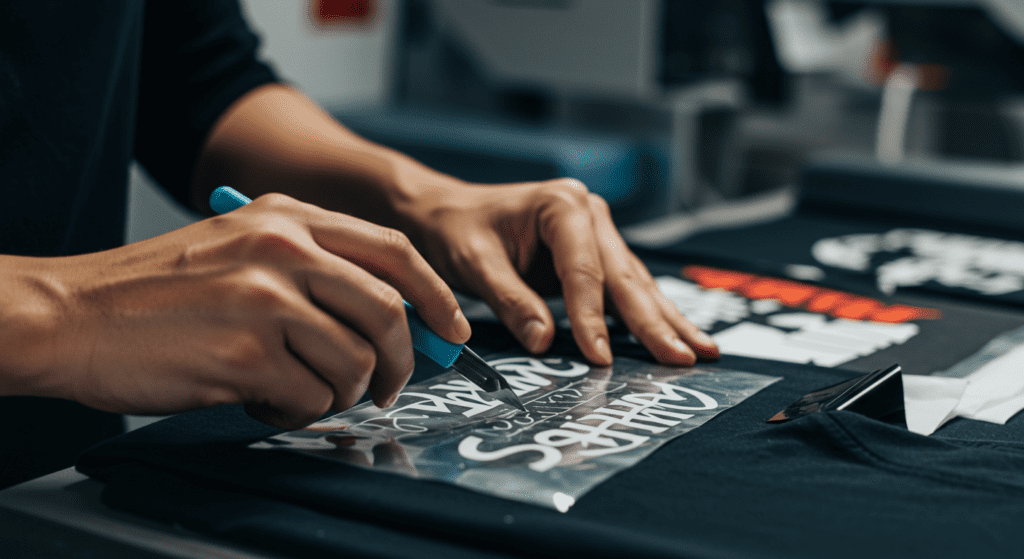
First — what is weeding, and why does it matter?
Weeding is simply removing the leftover vinyl from around your design after your machine cuts it. Rush it and your transfer turns out messy. Nail it and your finished piece looks like it came straight from a shop. Why it’s worth slowing down for:
- Your design pops — no stray bits of vinyl clinging to the edges.
- Your press goes smoothly, whether it’s a tee, a tumbler, or a tote.
- Your finished craft looks polished and professional — the kind of thing people start asking you to make for them.
The more detailed your design, the more your weeding technique matters. Tiny script fonts and intricate cuts are where good habits really pay off.
The tools that make weeding easier
You can weed with a pin and a lot of determination — but the right tools turn a chore into something almost relaxing:
- Weeding hook or pick — your main tool for lifting and pulling excess. A curved hook is gold for getting under tight spots.
- Tweezers — perfect for grabbing fine bits like the centers of letters.
- Craft knife (X-Acto) — handy for scoring and lifting stubborn pieces without disturbing the design.
- Light pad (optional) — a game changer for intricate cuts; it lights up your cut lines so you can actually see what you’re doing.
- Transfer tape — keeps everything in place when you move your design onto its surface.
How to weed vinyl like a pro
1. Peel off the big sections first
Start with the large areas of excess around your design. Clearing the bulk first gives you a clean view of the detail work that’s left — and honestly, it’s the most satisfying part.
2. Try reverse weeding for intricate designs
For super-detailed cuts, flip the script: lay transfer tape over the front, then peel the backing away from the design instead of picking out pieces one by one. It saves your tiny details from lifting by accident.
3. Use a light pad to see your cut lines
If you’ve ever squinted hunting for a faint cut line, a light pad solves it instantly. The backlight makes every line glow, so you know exactly what to pull and what to keep.
4. Work from the inside out for small details
For letter centers, eyelets, and tiny cutouts, weed the inside pieces before the outside. Reach for your hook or tweezers and take the fiddly bits slow.
5. The lint roller trick for tiny scraps
Weeded bits love to stick to everything — your mat, your sleeve, your next project. Run a lint roller over your workspace to grab them fast and keep stray scraps off your finished design.
Common weeding mistakes (and easy fixes)
- Cutting too shallow. If the excess won’t lift cleanly, your blade pressure is too light. Bump it up — and always run a test cut on a scrap first.
- Rushing it. Speed is where designs tear. Go slow, especially on detail, and let your tools do the work.
- Peeling the HTV carrier sheet too soon. Follow your vinyl’s peel instructions — cold peel means let it cool, warm peel means lift while it’s still warm.
- Skipping transfer tape on small details. For tiny fonts and intricate patterns, transfer tape (or reverse weeding) keeps everything aligned when you move it.
Go make something great
Weeding gets faster and cleaner every single time you do it — and with these tricks you’ll spend less time picking at scraps and more time showing off finished projects. Grab your tools, cue up a good playlist, and weed like the pro you are. 🎨
Got a weeding trick of your own, or a design that’s giving you grief? Drop it in the comments — we love seeing what you’re making.